(Show Contents)
Installing the Application Extension Environment
Note: The following instructions are for application extension development using Web Central 20.1 and later.
ARCHIBUS application extension environment allows you to extend ARCHIBUS forms and business logic.
Note: To extend a specific application, you need to obtain a license file that grants access to that application's domain. For example, if you want to modify space forecasting views or logic, you should obtain the license for the AbSMP domain.
Installation Requirements
In order to install ARCHIBUS software, you must have administrative rights on Windows Vista, or power user rights on Windows XP.
The hardware requirements are as follows:
- At least 1 GB of RAM (2 GB is recommended).
- At least 1 GB of free hard drive space.
- Dual-core CPU is recommended.
ARCHIBUS application extension environment includes:
- Java Runtime Environment (version 1.5.0.17).
- ARCHIBUS Eclipse distribution (version 1.7).
- Sybase Adaptive Server Anywhere Database Engine (runtime database engine, version 9.0.2.2451).
- Jetty servlet container (version 6.1).
Step 1: Install ARCHIBUS and verify the installation
- Run the ARCHIBUS Web Central and Smart Client 20 installation program, which installs:
- Java Runtime Environment, Sybase Runtime database engine, and Jetty.
- Web Central and Smart Client files, including the sample HQ database, schema files, projects, libraries, and configuration files.
- Start the Smart Client application
- Verify that the Smart Client application works as expected. Try:
- Process Navigator tasks
- Drawing views
- Grid views
- Click on Stop button in the Smart Client toolbar to stop the database and the application server.
- Restart database: run the \
ARCHIBUS\docs\eclipse\Start-Runtime-HqDb.bat file. This is required to run Web Central application server or your unit tests from Eclipse, so that Web Central or unit tests can connect to the running database server.
By default, Web Central and Smart Client files are installed to the following locations:
| Files
|
Windows XP
|
Windows Vista, Windows 7
|
| Program files |
C:\Program Files\ARCHIBUS\20.1 |
C:\Program Files (x86)\ARCHIBUS\20.1 |
| ARCHIBUS files |
C:\Documents and Settings\All Users\ARCHIBUS |
C:\Users\Public\ARCHIBUS |
Step 2: Install ARCHIBUS distribution of Eclipse
Import the Applications project into Eclipse workspace
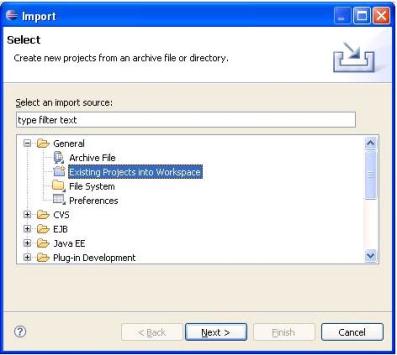
- Select in the main menu: File --> Import --> General --> Existing Projects into Workspace. Click on the Next button:
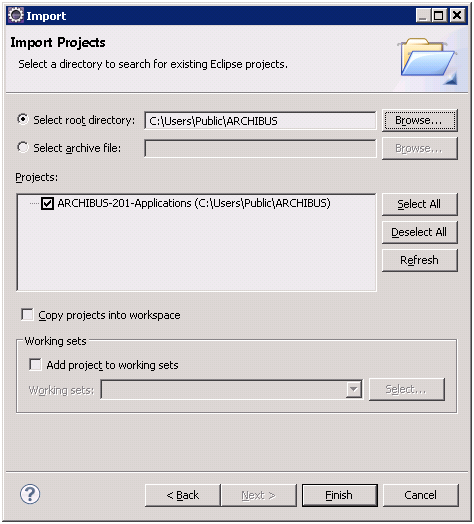
- Browse to the application root folder: C:\Documents and Settings\All Users\ARCHIBUS\ (Windows XP) or C:\Users\Public\ARCHIBUS (not Windows XP) and click on the Finish button. It will take several minutes to build the project.
- Select in the main menu: Window --> Show View --> Other. Select Java --> Package Explorer.
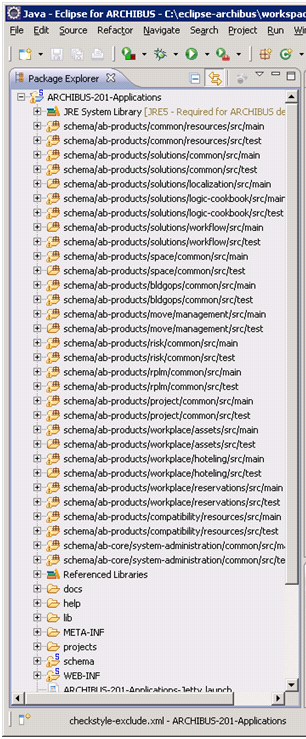
- You will see the application source code and schema file tree in the Package Explorer window:
Run Web Central Jetty Server from Eclipse
- Open a perspective on the project that includes the Console window. To do so, select Window --> Open Perspective --> Java
- Select the ARCHIBUS-201_Applications-Jetty.launch file in the Package Explorer window.
- Select in the main menu: Run --> Run As... -> ARCHIBUS-201_Applications-Jetty.
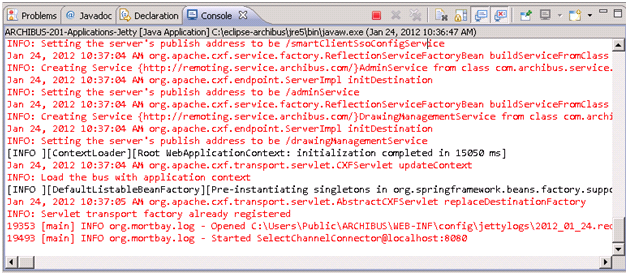
- The Jetty server will start and Eclipse will display the startup messages in the Console window. There should be no error messages on the console or in archibus.log file.
- Wait until you see the "Started SelectChannelConnector@0.0.0.0:8080" message:

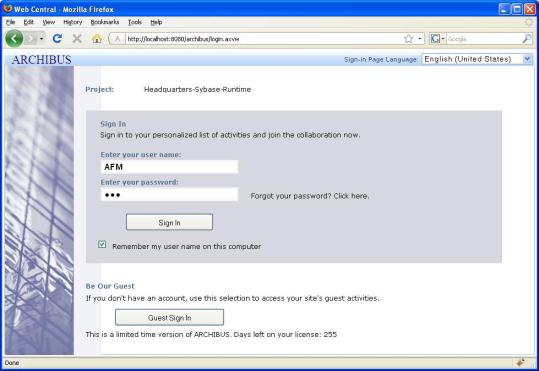
- Verify that Web Central works: enter http://localhost:8080/archibus/ in the browser, login as AI/afm. You will see the Process Navigator:
Stop Web Central Jetty server from Eclipse
- Click on the Terminate icon (red square) in the Console window toolbar: