(Show Contents)
Localizing the Smart Client Programs
Use the following steps to localize the Smart Client programs.
Step 1: Download the Visual Studio Smart Client Localization Project
To localize the Smart Client programs, you must download the Smart Client Visual Studio (VS) project from the ARCHIBiz section of archibus.com. ARCHIBiz is available to authorized users and ARCHIBUS Business Partners.
- Log in to the ARCHIBiz Partner Network, and click on the Support link.
- From the Support Files & Downloads/Version XX Downloads section, download the VS Smart Client Localization Project.
Step 2: Extract translatable strings from the .resx
In this step, you use the Web Central Localization application to read the translatable strings from the .resx and store them in the localization tables.
- Locate the English .resx in the Smart Client Visual Studio project, and place them in the ...\archibus\projects\users\ai\localize\ folder, where “ai” is the username that you use to log into Web Central.
- In Web Central, go to Technologies > Localization > Localization > Read or Write Translatable Files.
- Select the target Language.
- Choose “Include All Applications…”.
- Check “Resource files (.resx)”.
- Click on “Read Files”. The localization kit extracts the translatable strings for the Smart Client.
Step 3: Export the translatable strings to a spreadsheet
After extracting the translatable strings, follow the normal process for obtaining translations by exporting the strings to a spreadsheet. Your translator can use the spreadsheet to enter the required translations.
- In Web Central, go to Technologies > Localization > Localization > Export or Import Localization Extract Files.
- Select the target language from the Language list.
- Select "Include all strings" or "Only strings requiring translation" (to include only strings that have not yet been translated into the target language).
- Select the file format.
- Click Export Extract Files.
The links to the extracted files appear in the Exported Files section of the screen. These files contain the translatable strings. Your translator can add translations to this spreadsheet.
Step 4: Import the translated strings
Once you have received the spreadsheet back from the translators, you import the file back into the localization tables.
- In Web Central, go to Technologies > Localization > Localization > Export or Import Localization Extract Files.
- Select the target language from the Language list.
- Click Import or Compare Extract Files.
- Follow the instructions from the wizard to import the files with the translated strings. If more details are needed, see “Importing Localization Extract Files.”
Step 5: Create the translated *.resx
After translations have been obtained and you have imported the translated strings into the localization tables, you are ready to create localized Smart Client files.
-
Place the English .resx into the ...\archibus\projects\users\ai\localize\ folder, where “ai” is the username that you use to log into Web Central.
- Go to Technologies > Localization > Localization > Read or Write Translatable Files.
- Select the target Language.
- Choose “Include All Applications…”.
- Check “Resource files (.resx)”.
- Click on “Write Files”. The localization kit will create translated *.resx with locale suffix (that is, Resources.fr-FR.resx) based on the English file (that is, Resources.resx).
Step 6: Build the language-specific Resource DLLs
To build the language-specific Resource.DLLs:
- You must install .NET Framework v3.5 SP1.
- To add the resource files to a project, you have to use Visual Studio (VS). If you do not have Visual Studio installed, then download and install the express version of VS 2008, C# option, using the following URL:
http://msdn.microsoft.com/en-us/express/future/bb421473
Note: Visual Studio is needed for the convenience of adding resource files to the project. If you have VS 2008 installed and want to build the project using it, you must also install VS 2008 SP1.
- In Windows Explorer, under the C: drive, create a folder and name it Localization.
- Log in to the ARCHIBiz Partner Network, and click on the Support link. From the Support Files & Downloads/Version XX Downloads section, download the VS Smart Client Localization Project, and copy the downloaded SmartClient folder into the Localization folder you created in Step 3.
- In the downloaded SmartClient folder, copy the newly localized resource file(s) into the corresponding projects.
Your localized .resx files must follow .NET naming convention and should be named in the following format: <filename.xx-XX>.resx, where xx indicates the country and XX indicates the locale or national variant. For example, following the NET conventions, the resource file for German language is - MainForm.de-DE.resx.
- Open VS and add the new resource files to the corresponding projects. Save all the changes.
- Start the build.
As an alternative to building the project using VS, you can use the .NET 3.5 SP1 compiler. To do so, create a file with the extension of .bat or .cmd, and copy and paste the following context:
Set SLN_PATH= C:\Localization\SmartClient\ Localization.sln
Set LOG_PATH=C:\Localization\Logs\rs_log.txt
del /q “%LOG_PATH%”
C:\WINDOWS\Microsoft.NET\Framework\v3.5\msbuild.exe “%SLN_PATH%” /t:Rebuild /p:Configuration=Release /fileloggerparameters:LogFile=“%LOG_PATH%”
- Once the build finishes, you can find the newly built resource dll’s in the C:\Localization\SmartClient\SmartClient.DLL\xx-XX folder. The xx-XX name represents the .NET language convention.
- Put the newly build resource dll’s into the xx-XX folder which is located beneath the SmartClient installation directory.
If the xx-XX folder already exists, then copy the build resource dll’s into that folder. If it does not exist, then you have to copy the folder from \Localization\SmartClient\SmartClient.DLL\xx-XX into the SmartClient installation directory.
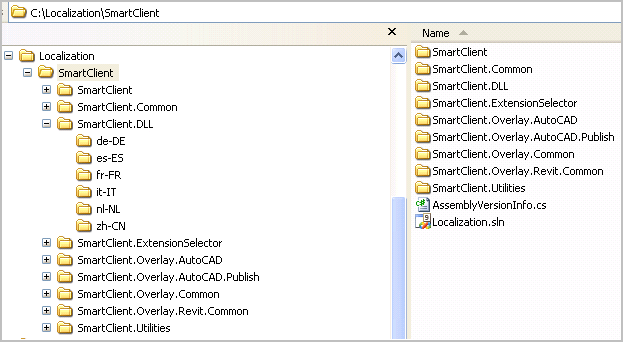
The following shows the Smart Client localized project structure:
- Test the UI of your localized Smart Client program.