
For the production deployment, you should consider using chain trust versus peer trust. See in How To: Create and Install Temporary Certificates in WCF for Message Security During Development in http://wcfsecurity.codeplex.com
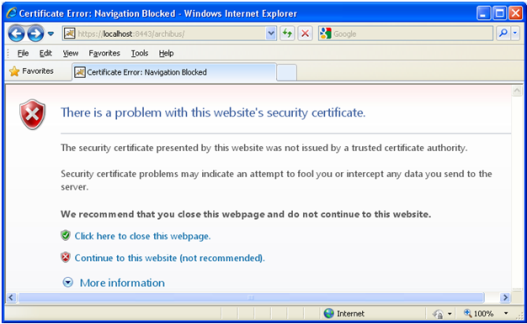
If you see error message “The Name of the Security Certificate Is Invalid or Does Not Match the Name of the Site”, that means, according to http://support.microsoft.com/kb/813618, that:
“The common name that you specified when you generated the certificate request for that Web site does not match the URL that is used to access the Web site. For example, if you access the site by typing an IP address or the server name, but the common name that is specified in the certificate request is www.adatum.com, you receive the security message.”
Excerpts from http://fusesource.com/docs/broker/5.3/security/i382183.html:
HTTPS URL integrity check
The basic idea of the URL integrity check is that the server certificate’s identity must match the server host name. This integrity check has an important impact on how you generate X.509 certificates for HTTPS: the certificate identity (usually the certificate subject DN’s common name) must match the host name on which the HTTPS server is deployed.
The URL integrity check is designed to prevent man-in-the-middle attacks.
Using commonName
The usual way to specify the certificate identity (for the purpose of the URL integrity check) is through the Common Name (CN) in the subject DN of the certificate.
For example, if a server supports secure TLS connections at the following URL:
https://www.progress.com/secure
The corresponding server certificate would have the following subject DN:
C=IE,ST=Co. Dublin,L=Dublin,O=Progress,
OU=System,CN=www.progress.com
Where the CN has been set to the host name, www.progress.com.
For details of how to set the subject DN in a new certificate, see Use the CA to Create Signed Certificates in a Java Keystore
Special Requirements on HTTPS Certificates
How To: Create and Install Temporary Certificates in WCF for Message Security During Development
Differences Between Service Certificate Validation Done by Internet Explorer and WCF
| Copyright © 1984-2014, ARCHIBUS, Inc. All rights reserved. |