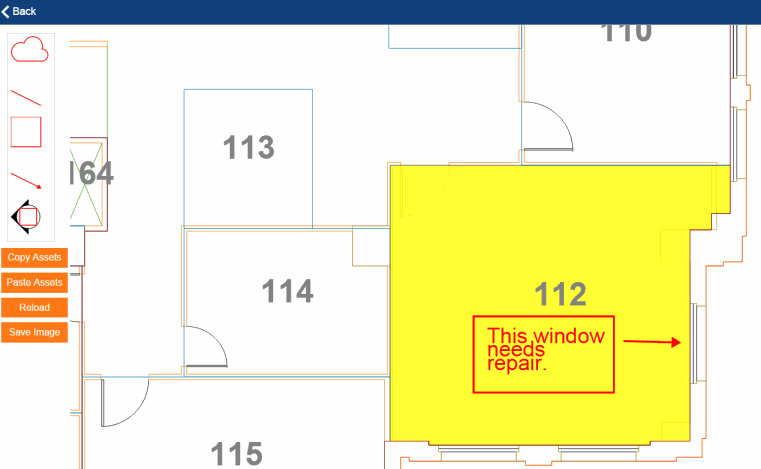
When observing conditions in the field, mobile users may want to mark up floor plans and site plans by adding notes or indicating areas that need attention. Or, they may want to photograph a condition and then add notes to the image. For example, when performing an equipment survey, the mobile user might want to indicate the location within a room of an extra piece of equipment. Making these kinds of edits on drawings is known as redlining.
If a task offers the redlining feature for a floor plan, it displays a "Redline" button in the upper right corner. Choose this, and the system opens the floor plan with the redlining tools (cloud, arrow, text box, and so on) in the left pane.
You might also want to redline the photos that you capture in mobile and attach as documents to items. For example, when using the Assessment app, you might want to use your mobile device's camera feature to capture a photo of an equipment item that needs repair and then add a redline to indicate the exact area of the equipment item that is broken.
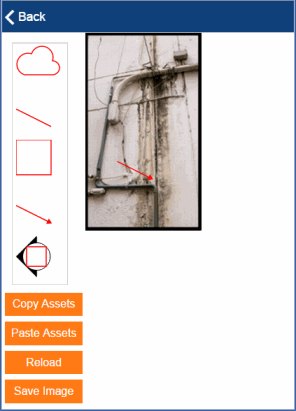
To redline an image, you must first capture it with your device's camera features and then save it as a document. You can then add a redline:
When you tap the Save Image button, the system save the redline image as a PNG file and stores it as a document in the appropriate table of the application at hand. For example, for the Assessments mobile app, it is stored in the Document 4 field of the Assessment Items table; for the Equipment and Asset Survey app, the system stores the PNG as a document in the Asset Survey Redline field.
Note that unlike storing photos as documents, you can save only one redline drawing (PNG file) per item.
If you add redlines to an image (JPG file), the system converts the JPG to a PNG and replaces the existing JPG.
Follow these steps to add redlines to floor plan drawings and images.
| To ... | Do this ... |
|---|---|
| Add redlines | Drag the shapes, text boxes, and arrows from the left pane onto the floor plan. If you use the text box tools, the system prompts you to enter the text you want to display. |
| Edit a redline |
Drag it to move it. Select it to access commands for rotating, deleting, or changing the text. |
| Copy a redline | Click the item and choose Copy Assets in the left pane. Choose Paste Assets and the system pastes the copy directly on top of the original. Tap the item and you can drag the copy to the desired location or use the commands to further edit it. |
| Cancel your changes | Choose the Reload button to remove the redlines and reload the drawing it its last saved version. |
| Save the drawing with the redlines |
When satisfied with your redlines, choose the Save Image button.
The system updates the counter on the Documents button to include the redlined file as one of the documents stored for this item. |
| View the redlined drawing |
Choose the Documents button from the mobile app; the system lists your documents (JPGs and PNGs) and provides thumbnails for easy identification. Next, choose the Display button for the PNG file holding the redline drawing. |
| Add to the redlined drawing | If you need to further edit the redline drawing, tap the Documents button and choose the Redline button for the PNG. The system opens the PNG file and presents the redline tools so that you can add further redlines. |
| Copyright © 1984-2018, ARCHIBUS, Inc. All rights reserved. |