You can add jacks to your inventory from the Telecom Console's from:
Note: You can also Automatically Create Jacks for Faceplates based on configuration information that you define.
Note: For information on representing jacks and faceplates on the floor plan, see Representing Equipment and Telecom Devices in CAD.
Jacks already created for the selected faceplate, if any, appear below the list of faceplates.
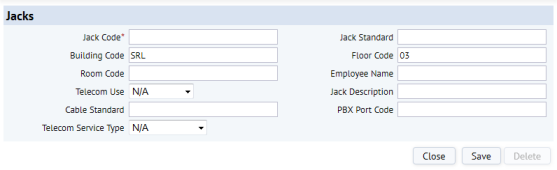
A Jacks form for the selected faceplate, building and floor opens.
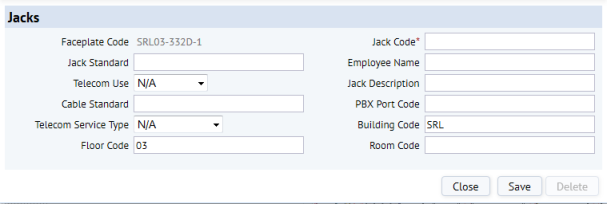
| Field | Purpose |
|---|---|
| Jack Code | Enter a unique code to identify the new jack in the telecom inventory. Recommended: assign a code that locates the jack by building, floor, and room, with a D or V suffix to indicate whether it is a voice or data jack. For example: HQ-17-101-D, or HQ-17-101-V. |
| Jack Standard | Specify the type of standard for this jack. Click the Select Value button, and select a standard from the list of existing jack standards. |
| Jack Description | Enter a brief panel description if desired. Your entry should describe the Jack Standard. |
| Telecom Use | If applicable, select the jack's use within your network from the drop-down list. For instance, if you select Voice for Telecom Service Type, select Telephone from the Telecom Use drop-down list. |
| Telecom Service Type | If applicable, select the jack's telecom service type from the drop-down list. For instance, if you select Telephone for Telecom Use, select Voice from the Telecom Service Type drop-down list. |
| Building / Floor / Room Code | Specify the location of this jack. Click the Select Value button for each field, and select from the list of locator codes in the database. |
| Employee Name | Specify the employee using this jack. This is typically the occupant of the room. Click the Select Value button, and select the employee who uses the jack. |
| Cable Standard | Specify that the jack uses a certain type of cable by choosing it from the list of existing cable standards. Cable standards are also associated with jack standards, so if the jack standard specifies a cable standard and this jack uses the defined standard, there is no need to complete this field. |
| PBX Port Code | If applicable, enter a PBX port code for the jack. |
A Jacks form for the selected building and floor opens.

| Field | Purpose |
|---|---|
| Jack Code | Enter a unique code to identify the new jack in the telecom inventory. Recommended: assign a code that locates the jack by building, floor, and room, with a D or V suffix to indicate whether it is a voice or data jack. For example: HQ-17-101-D, or HQ-17-101-V. |
| Jack Standard | Click the Select Value button, and select a standard from the list of existing jack standards. |
| Jack Description | Enter a brief panel description if desired. Your entry should describe the Jack Standard. |
| Telecom Use | If applicable, select the jack's use within your network from the drop-down list. For instance, if you select Voice for Telecom Service Type, select Telephone from the Telecom Use drop-down list. |
| Telecom Service Type | If applicable, select the jack's telecom service type from the drop-down list. For instance, if you select Telephone for Telecom Use, select Voice from the Telecom Service Type drop-down list. |
| Building / Floor / Room Code | Click the Select Value button for each field, and select from the list of locator codes in the database. |
| Employee Name | Click the Select Value button, and select the employee who uses the jack. |
| Cable Standard | Click the Select Value button, and select a standard from the list of cable standards in the database. |
| PBX Port Code | If applicable, enter a PBX port code for the jack. |
Note: As you plan your connection inventory, decide whether you want all jacks assigned to faceplates, some jacks assigned to faceplates, or no jacks assigned to faceplates.
See also:
Concept: Modeling Faceplates and Jacks
| Copyright © 1984-2016, ARCHIBUS, Inc. All rights reserved. |