Ouvrir la rubrique avec les liens de navigation
Review these basic operations for the Space Console.
Access the Space Console from:
Since occupancy and space data is tightly related, the Space Console offers both types of data in one convenient spot. Space mode (shown above) focuses on the your rooms and their assigned categories and departments, and Occupancy mode focuses on where employees are situated within this space. Occupancy mode has the same appearance as Space mode (shown above) with the exception that the asset tabs present the Employees tab rather than organizations, room categories, and rooms.
With both modes, you can search for particular data, create data, access floor plans, and make changes right on the floor plan. Toggle between the two modes by click on the mode selector buttons at the top of the Space Console.
Occupancy mode also offers the Team Space features, which are turned off by default. For information, see Team Space Overview and Activating Team Space.
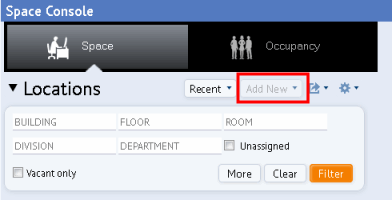
Your facility manager may want to prohibit certain users from editing room and employee information and allow them to view this information only. For example, department managers may benefit from knowing how much space they have and how it’s utilized, but they are not authorized to make changes. For users with read-only access, the Space Console grays out or hides the editing elements. For example, in the below image, the user does not have edit access and so the "Add New" button is grayed out. The review user can perform all other actions (filter, display and highlight floor plans, export data, and so on) but they cannot edit location and employee information.
Facility managers set review-only access for a user by assigning the user to a role whose security group is SPAC-REV or whose roles do not include the SPACE-CONSOLE-ALL-ACCESS security group (or do not include a wildcard that encompasses the SPACE-CONSOLE-ALL-ACCESS, such as the SPAC% or % security groups). In other words, the SPACE-CONSOLE-ALL-ACCESS security group gives complete access to the Space Console, and users whose roles do not belong to this security group receive read-only access.
For information on security groups, see ARCHIBUS System Management Help.
Beneath the mode selector buttons you will find the Locations Filter, which provides two important functions:
You can hide the Locations filter and floor plan list so that there is more room to display the information in the asset tabs. This is handy to do after you select a floor plan or set the restriction filter.

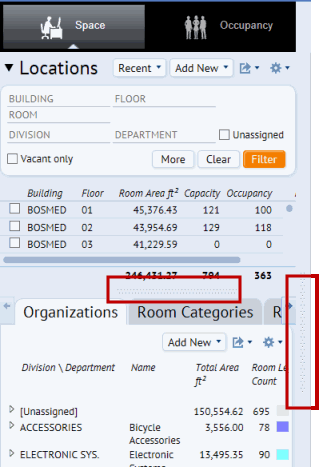
The asset tabs, located at the bottom of the Space Console, display your space and occupancy data. In Space mode, toggle between the tabs by clicking on them; Occupancy mode displays only the Employees tab. For more information, see Review Organization, Room Category, Room, and Employee Information (the Space Console's asset tabs)
On the right side of the screen, the Space Console displays the floor plans that you select. Above the floor plan, you will find the Floor Plan ribbon with options for controlling the highlights and labels for the floor plan. The Floor Plan ribbon also offers commands for exporting the floor plans. For more information, see Display Floor Plans and Floor Information.
The Space Console presents data in panels, which are sections of the screen that load specific items, such as a database table, filter, or floor plan. You may want to hide and resize panels so that you can better focus on specific data or drawings. Use the splitters between panels to control the panels.
Drag the mouse between two panels to locate the splitter. Click and drag the splitters between panels. You can resize both vertically and horizontally.
Click on the dotted area of the splitter.
Once you hide a panel, the console displays a small gray triangle between panels. Click on the triangle to restore the panel.
| Copyright © 1984-2019, ARCHIBUS, Inc. Tous droits réservés. |