Smart Client Extension for AutoCAD
Adding Blocks to Floor Plan Drawings
To represent items such as computer and office equipment, telecommunications equipment, furniture, and people in your drawings, you use the Archibus Insert Block command.
Once you add a block to the appropriate layer of a drawing, you can convert it to an asset symbol and link it to a database record by using the Archibus / Asset / Edit Data command. This is covered in the Asset Symbols topics.
To add a block to a drawing
- Make the layer on which you want to insert a block the drawing's current layer.
- Select the Insert Block task from the Navigator. For example, select Asset Management / Asset Portal / Equipment Inventory / Insert Block.
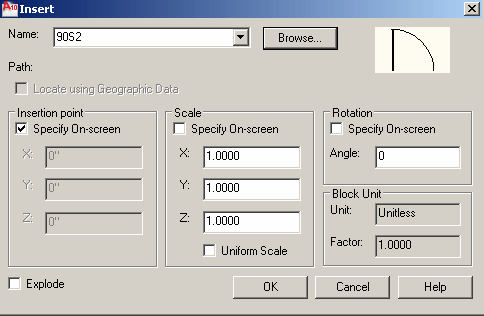
The Insert dialog box appears.
- From the dialog box,
choose one of the following and click OK when through:
- To select a block that has already been used in this drawing, press the down arrow icon in the Name option and choose a block from the list. This list presents only blocks that have already been added to this drawing; these blocks are stored in the drawing’s block table.
- To select a block that is not yet present in this drawing, choose Browse. In the Select Drawing File dialog box, find and select the .DWG file that represents your block. Note that you can choose a block drawing from any directory.
- Retain the default options for scale and rotation angle.
- Click OK, and choose the point at which you want to insert the block by clicking the mouse.