Archibus Web Central
Using the Document Management System
From some views, you can access a document associated with the data you are viewing. For example, the Leases table has a Lease Contract field which can hold the file name of the lease contract, which is a Word document. From an edit form in Archibus Web Central, you can use the document management features to launch Microsoft Word to view this document. Depending on your permissions, you may also be able to check out this file for editing, check in your changes, delete the file, and lock and unlock it.
Fields that can launch associated documents have a series of buttons, as shown below. You can mouse over a button to see a tooltip that describes its function.

Note: The System Administrator at your site determines the file types (pdf, doc, xls, txt, etc.) that can be checked in and also whether the system supports tracking multiple versions of a document.
This topic has the following sections:
View a document
There are several ways to view a document:
| Show Document button | Click on the Show Document button, and Web Central extracts the file. If your browser has the appropriate plug-in to view the document, it appears in a separate browser window. Otherwise, the system prompts you to save the file locally so that you can launch the appropriate application yourself. You will receive a read-only version of the file. All documents stored using the Document field can be opened in this way. The button is available when you access the details pane for the record the document is attached to. |
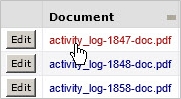
| Document file name is a link |
Additionally, in some views, the Document column presents the document file name as a link to the document. Selecting the link opens the document. This link is found in summary information presented for the record, enabling you to open the document without accessing the record's details pane.
|
| View button |
Some views include a View button, also found in summary information panes. Clicking the View button opens the document.
|

Check in a document for the first time
-
First, save the record t. This ensures that the document is always filed correctly, and associated with the correct record. After saving the record, the Document field activates the Check In New Document button.
-
Select the Check In New Document button (it is the only button available), as shown below.

-
The system prompts you to browse and select the file to check in. The system completes the field value with the original file name and stores it in the document vault by naming it according to the structured convention (such as, ls-001-lease_contract.doc).
-
You can choose to enter a comment about this document, and also set the lock status. Typically, you will want to unlock the document so that others can check it out.
In some cases, where multiple documents can be uploaded and attached to a single record, you click the Add New button and then use the Add Document dialog box to upload a document. When adding a document, you fill out the Document Name and Description, and save the document record before the system gives you the option to upload the document by showing the Check In New Document button next to the Document field.
Sometimes you may have several documents that you want to import at one time. For example, if you are working with the SDS application, you might have 1000+ SDS sheets currently on file that you need to load into the Archibus document system. For information, see Importing Documents in Bulk to the Document Management System.
Check in a document for the first time by dragging and dropping
You can also check in a document for the first time by dragging it from File Explorer and dropping it on top of the document field. The field highlights to indicate the drop area.
Dropping the file immediately checks the file into Archibus with the original file name. You do not have the opportunity to enter a description, as you do with the above method.
Check out a document for editing
If you want to edit a file, you must check it out. Click on the Check Out Document button. Web Central prompts you for a local folder in which to place the document, and automatically names the file according to its data relationships.
For instance, if you extract a document associated with the Lease Contract field of Lease 001, the program names the document after the table name (ls), document field name (lease_contract), and primary key value (001), such as ls-001-lease_contract.doc.
You can access the Check Out Document button only if you have edit security permissions. If the document is locked, you cannot check it out.
Other Options
- If there are multiple versions of the document and you have appropriate permissions, Web Central prompts you for the version you wish to check out. Choose the appropriate version from the prompt.
- You may be able to set the Lock Status. Typically, when you check out a document, you will want to set the status to Locked to indicate to other users that you are currently editing the document.
Check in a changed document
Once you have finished editing a document, you need to check it in. Click on the Check In New Version button. The system prompts you to select the file to check in.
If the field supports multiple versions of a document, Web Central will store this version as a separate file instead of overwriting the current version.
Before you can check in a document, you must save other changes to the record. This ensures that the document is always filed correctly, and associated with the correct record.
Other Options
- You may be able to enter a comment about the changes made to this version.
- You may be able to set the Lock Status. Typically, when you check in a document, you will want to unlock the document so that other users can now check it out.
Lock or unlock a document
The goal of locking documents is to prevent two or more people from editing the same document at the same time, which results in two or more different branches of changes. Typically, you lock documents as part of the check out procedure and unlock documents when you check them in.
However, in some circumstances you may need to change the lock status separately from the check-in and check-out processes. In these cases, use the Lock Document and Unlock Document buttons.
Delete a document
Use the Delete Document button to remove the field's reference to the document. Web Central clears the file name value from the document field.