(Show Contents)
Localization Process
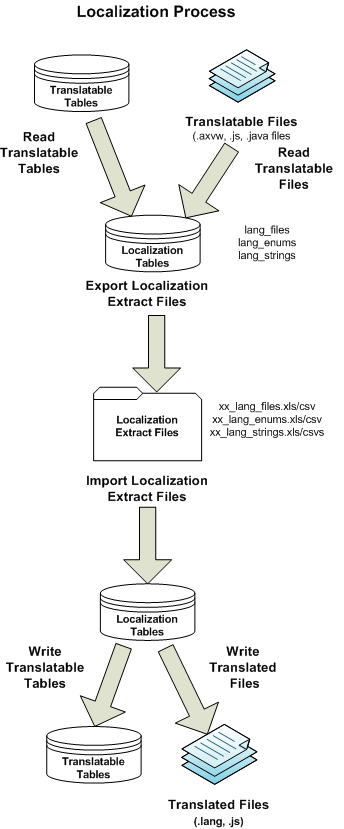
The localization process includes the following steps:
- Read: First the program reads all strings from translatable tables and translatable files into the localization tables.
After reading these strings, the localization tables have all strings in the software. If you fill in the translatable values in the lang_files, lang_strings, and lang_enum tables, you can write the values back to the tables and files and have a complete translation.
- Export: A common step is to export the localization tables to Excel, so that they can be sent to a professional translator for the first-pass translation. This step is useful when working with external translation houses, as their translation software (for example, Trados) can work directly on the Excel file, automatically translate duplicates, and make use of any translation memory created in previous translation rounds.
Note: If you are exporting just to import the strings into another database, use Comma-Separated Values Format (CSV) instead of XLS format.
- Import: Once the strings are translated, import them back into the localization tables.
- Write: Write the strings back to the translatable tables, and write the lang, and .js files for Web Central.
The following diagram gives a high-level view of the localization process:

See Also
Concepts
Localization Application (Overview)
Glossary Process
Localization Tables
Translation Tables in the Project Database
About the Data Transfer Status Field

