
Some ARCHIBUS views present the 3D Navigator so that you can access 3D BIM models created in Revit saved as 3D enterprise graphics, directly from ARCHIBUS reports and views. Views that include the 3D Navigator display the 3D enterprise graphics if they are available.
To display 3D models in a view, you must have:
The following views offer the 3D Navigator:
When using the 3D Navigator with the sample HQ project, select floors and equipment located in the NB building, as the sample data includes 3D enterprise graphics for this building.
Regardless of the view in which it is presented, the 3D Navigator typically presents these options:
Use the Categories panel to control the Revit categories displayed by drawings in the 3D Navigator.
When you first load a view, the Categories panel highlights in yellow the categories that the 3D Navigator displays by default. You can change this display by clicking on the panel entries to toggle them off and on.
The specific commands on the Categories menu vary between each view. When working with the Equipment Systems Console, note that you can control the specific floors that the model displays by clicking on the individual floor entries, listed at the bottom of the panel. These options are not present in the Space Console view because you can select floors from another panel.
Once you finish, you can hide the Categories panel buy clicking its "minus" button, located in the menu's upper right corner.

The 3D Navigator provides a toolbar, located in the upper left corner, with these commands:

From left to right, these icons are:
| Icon | Action |
|---|---|
| Orbit |
Mouse drag over the drawing to change viewing angle. |
| Pan |
Mouse drag over the drawing to move it. Pressing down Shift key and dragging the mouse will move the drawing. |
| Menu | Displays the Context menu, described below. |
| Home |
Clicking this icon restores the original position of the drawing. Pressing the Esc key also restores the original position of the drawing. |
You can zoom the 3D enterprise graphics with these methods:
You can use context menus to manipulate selection of 3D assets. The exact options on the 3D menus will depend on the view from which you are accessing the 3D Navigator. Right-click the mouse while in the 3D Navigator to access the context menu.
For example, a view's context menu might offer options such as:

Most context menus for the 3D Navigator offer these commands:
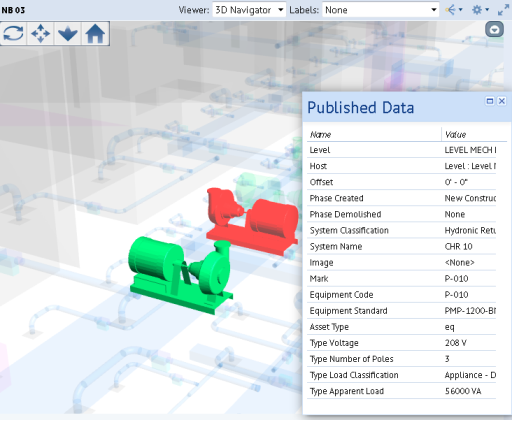
The view might include a menu such as the following so that you can control the highlights and labels in the 3D graphics.

Note that the Isolates option enables you to more easily see and select objects in the 3D model. You can still select items without isolating them, but it may be difficult. From the Isolates menu, choose the type of item you want to work with, and the 3D Navigator focuses on that type of item.
For example, the Isolate Equipment option renders all non-equipment items transparent so that you can see through the model and select the equipment that is buried in the model. In the top image, Isolates is set to None. In the bottom image, Isolates is set to Equipment.

| Copyright © 1984-2019, ARCHIBUS, Inc. All rights reserved. |