Archibus SaaS / Foundations / Space and Moves / Space Console
Archibus SaaS / Space / Space Manager / Space Console
Space / Space Inventory / Space Manager / Space Console (non-transactional)
Space / Occupancy / Manager / Space Console (non-transactional)
Export Floor Plans to Word or PDF and Print
Note: This topic covers the basic features of exporting drawings for printing to PDF or DOCX. For a complete description of the features including selecting background layers to export, or making ad hoc adjustments to a drawing, see Options for Printing Drawings from the Space Console.
To share floor plans with staff who do not have access to the Archibus system, you work with the Export commands to export your floor plans to Word or PDF, and then print the documents for distribution.
This topic has the following sections:
- Examples
- The Export commands
- Export floor plans on the screen to Word (Export What You See to DOCX)
- Export floor plans in the floor list to PDF or DOCX
- Generate a formatted ad hoc report
- Example: Export a floor plan when the enterprise graphics file is too busy
- Zoom setting and export format
Examples
Exporting a highlighted and labeled floor plan
Once you highlight and label a floor plan, you may want to share it with others who do not have access to the Archibus system. For example, you may want to:
- share with department heads a floor plan highlighted by department so that you can discuss future space needs.
- print a floor plan labeled with the employees occupying each room (an occupancy plan) and post it in a common area so that employees can find their co-workers.
- share a floor plan highlighted by department and vacancy status to show department heads how they can better utilize their assigned space.
- print out a floor plan highlighted by room type and bring it to a meeting to discuss space renovations and reconfiguration.
The below image shows a floor plan highlighted by division and exported to a Word document.
Floor plan without highlights
You may want to export floor plans that do not have any highlights. For example, staff members might want to print out floor plans and then make notations on the hard copies for their own unique purposes, such as work orders, department reviews, reports, and one-off maps. A printed floor plan that is highlighted in various colors is not necessary, and in fact, the highlights might detract from notations that users make on the hard copy.
There are two methods:
-
Use the Space Console's Labels command to add labels. Use the Export to PDF and Export to Word commands to export all published layers in the enterprise graphics file, as well as labels that you choose from the Space Console.
-
Use the Space Console's Assets and Labels commands to set the display and run the Export What You See command.
Export commands
To export the floor plan drawings, you use the commands on the Export icon:

The Export commands export the enterprise graphics file (displaying layers according to how the drawing was published) as well as any layers, labels, highlights that you set with the Space Console's commands. Therefore, if you are not satisfied with the results of the generated file, you may need to have your CAD specialist republish the floor plan. For example, if the exported floor plan is too busy, you could republish the drawing with fewer displayed layers. This is not an issue for the Export What you See to DOCX command; it exports exactly what is on the screen. See Export a floor plan if the enterprise graphics file is too busy, later in this topic.
| Command | Description | Possible Highlights |
|---|---|---|
|
Export Floor Plans in Floors List to PDF Export Floor Plans in Floors List to Word |
Exports enterprise graphics file with the highlight and label options you set with the Space Console. If the floor plan is highlighted, includes a legend. |
None Border Highlight OR Highlight |
|
Export What you See to DOCX |
Exports exactly what is on the screen to DOCX in a low-resolution format (PNG) |
None Border Highlight AND Highlight |
|
Generate Ad Hoc PDF Report |
Exports the enterprise graphics file with the highlight and label options you set with the Space Console, as well as considering the options set with the options on the command's form. If the floor plan is highlighted, includes a legend. |
None Border Highlight OR Highlight |
Export floor plans on the screen to Word (Export What You See to DOCX)
With the Export What You See to DOCX option, the Space Console exports drawings with the highlights, layers, and zoom as currently shown on screen in a low-resolution format (PNG).
- Load the Space Console and select the floor plans you wish to export.
- If desired, adjust the zoom setting. Archibus will export these drawings at the current zoom setting and will present them as an image in the Word document.
-
Use the Assets command to set the type of assets you want to display, such as rooms, equipment, walls, and so on.
- Use the Highlights or Border options to set the appropriate highlights. Note that with this command supports highlighting a floor plan by both a highlight and a border highlight. For details, see:
- Use the Labels option to add the labeling text to the floor plan. For details, see Label the Rooms on the Floor Plan Drawing.
When you export the drawing, the system does not export the legend. Therefore, you may wish to match the label to one of your highlight options so that readers know the values that the colors represent. For example, if you are highlighting by Room Type, you might want to display Room Type as the label so that viewers can immediately see each room's assigned room type.
- Click the Export button, located in the floor plan ribbon. Click Export What You See to DOCX.
- Archibus exports the drawings on the screen with their current zoom, highlights, and labels as an image (low-res PNG) and places the image in a Word document.
- Archibus prompts you to open the Word document or save it.
- Once you open the Word document, you can resize the image of the floor plan. You might want to change the Word document to landscape mode and resize the image accordingly.
Export floor plans in the floor list to PDF or DOCX
This procedure describes exporting the floor plans shown in the Floors list to PDF or DOCX. This generates a formatted report with highlights, labels, and legends.
- Load the Space Console.
- Use the filter to display the list of floor plans that you want to include in the report. You do not need to select these floor plans or open them. All floor plans listed in the Location List will be included in the generated document.
Tip: If you select the check box for at least one drawing in the floors list, that drawing appears in the drawing pane, so that you can see how the selections you make affect the highlights and labels. Printing what you see can be useful in certain situations, for example, if you want to print multiple floors on the same sheet of paper, select the check box for more than one floor plan in the floors list.
- Optional: Select a highlight or border highlight and label from the lists. The selections you make determine the legend, labels, and label height.
For information on setting up highlights, see:
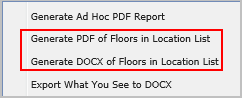
- Click the Export button, located in the floor plan ribbon. Click "Generate PDF of Floors in Location List" or "Generate DOCX of Floors in Location List." Note that if you generate a DOCX, labels are not included.
- Archibus opens a new window and presents a status bar showing its progress in generating the report. When Archibus completes the report, you can open it by clicking the file name for the generated report. You will see that the Space Console exported the full extents of drawing's highlights and layers in the original EMF file in the high-res format (EMF).
- When you examine the report, you will see that it lists on each page a highlighted floor plan with labels and a legend of the highlight colors.
- You can save the generated PDF to your own descriptive name and location.
Next steps
- If you want to set print options, you can do so as long as you are exporting to PDF. For example, if you want to adjust the label height that affect the text size, you can do so by making ad hoc adjustments that affect this print session only. see Options for Printing Drawings from the Space Console
- Select background layers to include in the export. See Selecting background layers in Options for Printing Drawings from the Space Console
Generate a formatted ad hoc report
- Load the Space Console.
- Use the filter to display the list of floor plans that you want to include in the report. You do not need to select these floor plans or open them. All floor plans listed in the Location List can be included in the PDF.
- Use the Highlights option to set the desired highlight. For details, see Highlight Rooms in your Floor Plan by One Property.
- Use the Labels option to add the labeling text to the floor plan. For details, see Label the Rooms on the Floor Plan Drawing.
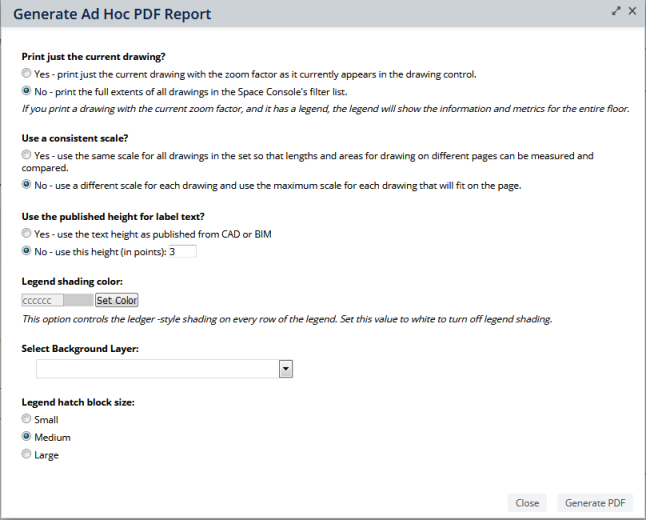
- Click the Export button, located in the floor plan ribbon. Click "Generate Ad Hoc PDF Report."
- Complete the options in the resulting form. For information, see Options for Printing Drawings from the Space Console
- Archibus opens a new browser window and presents a status bar showing its progress in generating the report. When Archibus completes the report, you can open it by clicking the file name for the generated report.
- When you examine the report, you will see that it lists on each page a highlighted floor plan with labels and a legend of the highlight colors.
- You can save the generated PDF to your own descriptive name and location.

Example: Export a floor plan if the enterprise graphics file is too busy
Suppose the enterprise graphics file has information that you do not want to print; you want to export the floor plan with only its floor and room outlines and labeled room numbers.
-
Load the floor plan in the Space Console.
-
Clear all highlights and border highlights using the Highlights and Border commands.
-
Invoke the Labels command and choose Room Number.
-
Invoke the Assets command and choose the information you want to display, such as Gross and Room boundaries. To include any options you made with the Labels command, choose Labels of Rooms.
-
Run the Export What you See to DOCX command.
Zoom setting and export format
Based on the current drawing’s zoom level, the Space Console exports and prints the drawing using different formats.
| Zoom Setting | Applies to |
| Export drawings with set zoom level in low-res format (PNG) |
Export What you See to DOCX command. Generate Ad Hoc PDF Report command, when you choose “Yes” to “Print just the current drawing?” option AND you change the zoom level of the drawing. |
| Export the full extents of a drawing's highlights, layers in original EMF file in high-res format (EMF) |
This applies to both Export Floor Plans in Floors List to PDF and Export Floor Plans in Floors List to Word commands. This also applied to Generate Ad Hoc PDF Report when:
|