Archibus Web Central
Marking Up Images and Floor Plans
Note: The current view determines the exact set of mark-up tools that are available. For example, the Space & Portfolio Planning Console includes tools for highlights and legends, whereas the Move Scenario Planner view does not offer this feature in its set of mark-up tools. This topic describes the general set of mark-up tools that might be available to a view; see the specific view topics for information on the exact features and procedures for working with a view's mark-up tools.
Note: This topic describes the redline and mark-up features that are included in views that use the HTML drawing control (the standard drawing control beginning with Archibus V.23.2). Custom views that use the Flash drawing control offer a similar, but different, set of redlining features. For information on Flash-based redlines, see Adding Redlines to Drawings (Flash drawing control).
Several Archibus views offer the mark-up tools as part of working with a floor plan, including:
- Space Planning / Space & Portfolio Planning Console
- Moves / Develop Move Scenario
- Enterprise Assets / Project Proposal Console
Markups can include:
- redlines
- room highlights according to a pre-defined plan type, such as vacant rooms
- room highlights according to a filter you specify or a set of rooms that you select
- highlight legends
Use markups to perform tasks such as:
- Indicate an area that should be re-assigned to a new department or physically reconfigured, such as converting from cubicles to open space.
- Indicate a location when submitting a service request
- Indicate a specific location within a room or other area on the floor plan where an employee safety incident occurred.
- Request a furniture or employee move in an open plan office by drawing arrows on a floor plan to indicate the intended location, or outlining the area with an area box.
- Review changes made to a floor plan.
Many types of users benefit from adding markups to drawings. For example:
- Department managers can provide feedback to CAD specialists on field conditions, such as, new walls, or rooms that have been joined.
- Managers can comment on drawing changes made by a CAD specialist
- Maintenance managers, service desk managers, safety managers, and so on can graphically see the exact location of an issue.
- Architects might need to review all the changes that have been made to a drawing. Markups can serve as a record of the requested changes. For example, when an architect is updating the as-built drawings for a portion of a building prior to a renovation, it can be helpful to review all markups made to that portion of the building in all service requests.
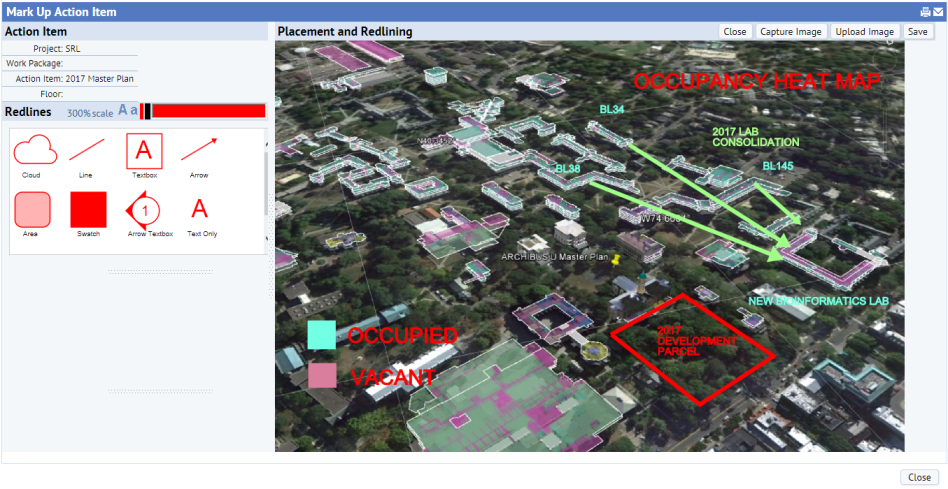
The below image includes a legend, redlines, and text boxes. Highlights are available only for floor plans and not images. In this case, the user captured an image of a map and added the highlights using another program; they then added the redmarks and legends using Web Central's mark-up tools. For floor plans, you can highlight rooms directly in Web Central using the mark-up tools.
Add Redlines
You can add redlines to drawings and images to point out specific areas. For example, you may want to circle a room on a floor plan drawing that needs to be reconfigured as part of a space reorganization.
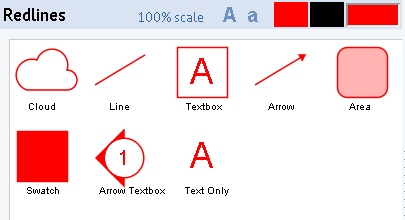
The Redlines panel offers several tools for marking up your floor plans and images.
Drag and drop the redline controls from the palette to the desired area of the drawing and size them as necessary.
You can use the text tool and the swatch tool to create a legend of your highlight colors.
Use the Area tool to outline an area in the drawing, such as an area that needs renovation. As you stretch the rectangle, it reports on the size of the area that you are outlining. For example, the below image shows the results of using the Area and Text Only tools to outline and label an area in the floor plan.

If you wish to use a color other than the default red, you can select Black or choose a custom color from the Custom button, on the right. If you set a custom color, the panel will display the Custom button in this color. All future redlines will use this color until you change the color again or exit.
Add Highlights
Your view may include tools for highlighting the floor plan; note that highlights are not available for images. For example, you may be able to highlight by:
- a plan type (pre-defined)
- a restriction that you define
- an ad-hoc restriction (a set of rooms that you select)
Once you add a highlight to the drawing, you can use the redlining swatch and text tools to create a legend explaining your highlight colors. For example, in the below image of the Space & Portfolio Planning Console, the user has assigned a title of "Merge these rooms." 
Save Markups
Each view offers its own command for saving the redlines and markups. For example, the Develop Move Scenario view includes a Save Markups command available from the Move Actions menu; the Space & Portfolio Planning Console offers a Save command. With both of these methods, the system creates a screen-scrape and saves it to the Document 4 document field of the Action Items table (the activity_log table). The system saves to the Archibus Redlines table (afm_redlines) the data that is necessary to re-create the markup and highlighting so you can edit it later on. The screen-scrape itself does not have enough information for you to later edit.
Note: Archibus Redlines table. The system creates a record in the Archibus Redlines table (afm_redlines) as soon as it opens (unless you're editing an existing record). This happens even before you click Save. It does this because it needs a record to exist in afm_redlines before saving a document in the corresponding activity_log record. This is counter-intuitive, and is a known issue.
Note: Exporting and Importing Markup in Projects -- If you are exporting and importing markup into and out of a project, be aware of the following: in order to access the markup when you import it back into the project, both the activity_log record and the afm_redline record must be exported.