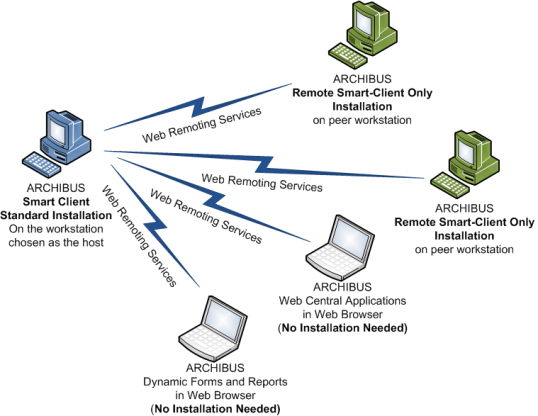
In a workgroup setting, you can use one workstation as the host that can support:
If your needs grow such that the program gets heavy network demands, then you will want to instead use the procedure covered in the Enterprise Installation topics (Deployment Strategies for ARCHIBUS). The enterprise installation puts the database server and application server on their own servers or cluster of servers to meet the demand. In addition to letting you meet the needs of high-demand environments, the enterprise installation lets you use other database servers, such as Oracle or the full Microsoft SQL Server, and it lets you use other application servers, such as Tomcat, WebLogic, and WebSphere.
To set up a small workgrounp, follow this procedure.
On the host workstation, perform the typical installation as described in Standard Single-User Installation topic.
Configure your host workstation to use one of the local database servers as discussed in the Configuring the Single-User Installation for Sybase or Configuring the Single-User Workstation for Microsoft SQL Server topic.
From your release disc, copy the remote-client-install\ARCHIBUS Smart Client xx.exe file ("xx" refers to the version number) to the archibus\remote-client-install folder on the host workstation. This folder is located in c:\users\public\ on Windows 7 workstations and in C:\Documents and Settings\All Users on XP and Vista workstations.
You must have administrator privileges to run the setup program.
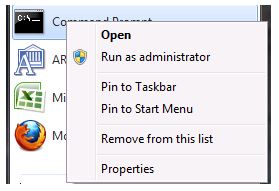
Navigate to the "ARCHIBUS Setup for Windows7 and Vista", right click on the setup.exe file, and select "Run as Administrator."
The standard setup program runs the "Sharing" command to create a file share to the projects folder (e.g. to the “c:\users\public\archibus\projects\”) on your workstation.
With this share name, peer workstations that are working with drawings or building models can access the projects folder. They would address this project folder as \\<workgrpsvr>\AIPROJECTS from within their CAD programs or from within the Windows Explorer, where <workgrpsvr> is the computer name of the host workstation. This share gives peers the ability to share project files, but not the ability to see any other part of your workstation or of the ARCHIBUS program folders.
You can check if the share name is properly established by starting the Smart Client and running the"Sharing" command. If the "Stop Sharing" button shows, then the share has been established. If not, press the "Start Sharing" command to create this share.
If you want to establish the share yourself, open the Windows Explorer, navigate to the c:\users\public\archibus\projects folder, right-click, and select the Properties command. From the Sharing tab, select "Share this folder" and enter AIPROJECTS as the share name. Use the "Permission" button to grant read/write permission to this folder.
Send an email message like the following (indented and in blue text below) to users on peer workstations. This sample message provides a link to access Web Central and a link to run the remote Smart Client-only installation:
Use this link to access ARCHIBUS Web Central in your Web browser:
http://<workgrpsvr>:8080/archibus
If you wish to use ARCHIBUS Smart Client only (without Web Central), run the following installation:
\\<workgrpsvr>\AIPROJECTS\remote-client-install\
ARCHIBUS Smart Client xx.exeYou must have administrator privileges to run the installation program, although you do not need these privileges to run Smart Client itself.
You can use the above ARCHIBUS Smart Client xx.exe installation program if you have not previously installed Web Central and Smart Client. If you have already installed these programs and wish to install only Smart Client (without Web Central), use Control Panel/Add or Remove Programs to remove Smart Client and Web Central. Then, run this installation.
http://<workgrpsvr>:8080/archibus).

If you copy a new version of the remote Smart Client-only installation onto the host computer, you can have the Smart Client prompt each user to reinstall from the host the next time they start the program.
To do so:
web-inf\config\smartclient.properties file in Notepad.SmartClient.reinstall property to true. SmartClient.reinstall.version to your current build version (e.g. 20.1.1.132).If you find the default URL of remote clients in the Smart Client Sign In form is not being set correctly for newly installed peer workstations, check the host computer name listed in projects\remote-client-install\smartclient.install.properties.
Enterprise installations with many clients workstations use a different means of updating the remote clients. They will incorporate the remote-client-install\msi\ARCHIBUS Smart Client xx.msi file on the ARCHIBUS release disc into their push installation to update the client workstations with no user intervention required.
The ARCHIBUS Smart Client XX.msi is the standard msi file. There are not any custom arguments that need to be sent to it. Installing or removing the program can be done through the command line window or through a batch file. The command line must form one line.
If you plan on using the batch file, for simplicity, place it in the same folder where the msi file and MST files are located. To get the list of the msi switches, you should open the command line window, and start the following command : msiexec.
Note that either the command line window or the batch file must be run with elevated admin privileges (right mouse click and choose option “Run as administrator”). Also, if command line arguments contain spaces, you must embrace them in double quotes.
A transform is a collection of changes applied to an installation. The transforms (files with MST extensions) can be found along with the ARCHIBUS Smart Client XX.msi file. Its name and number represent a language (see the Language Codes section below). To install other than the ENGLISH (EN) language, you should send the TRANSFORMS property to msiexec with the assigned value of a desired language, for instance TRANSFORMS=2052.mst.
Before providing the log argument and log file for install (/l*v ".\msi_SETUP.log"), you should activate the logging feature.
Create and run a file with extension reg, see below. You should launch the file prior to start installing the app.
REGEDIT4
[HKEY_LOCAL_MACHINE\SOFTWARE\Policies\Microsoft\Windows\Installer]
"Logging"="icewarmupv"
msiexec /i "ARCHIBUS Smart Client XX.msi" ADDLOCAL=ALL /qn /l*v .\msi_SETUP.log
msiexec /x<Productcode> /qn
{<Productcode>} – Please ask ARCHIBUS, Inc. to provide it for you.